JBeam Editor
A visual editor for BeamNG.drive's soft-body physics structures: import any 3D model, shrink-wrap it into a node-and-beam skeleton automatically, test it in a built-in physics preview, and refine it with 3D-tool controls instead of hand-typing coordinates.
Everything that moves in BeamNG.drive is a JBeam: a cage of points joined by springs, simulated so it can bend, crumple and tear. The model you see is just a skin on top.
Building one means typing hundreds of coordinates into a text file by hand, which is a big part of why making a vehicle for the game is so slow. I wanted to make hover vehicles, starting with pod racers, and that workflow wasn’t going to scale.
Years ago I’d seen a basic visual JBeam editor that let you place points in a 3D view. I wanted a modern take on that idea, built around one loop:
1. ImportBring in any 3D model, whether you made it in Blender or downloaded it.
2. ProposeThe tool wraps the model in a sensible first-draft structure for you.
3. RefineEdit it like you would in a 3D modelling tool, and test it in a physics preview before going near the game.
4. ExportGet a file that loads in BeamNG without any hand-fixing.
Designing what failure looks like
Before building anything, I wrote down what would make it a failure even if it technically worked. A clunky, dated feel. Exported files that need hand-fixing.
And above all, an auto-generator that just drops a point on every corner of the model. Game models are made of thousands of messy triangles, while a good JBeam uses a few hundred points, so the tool had to find the skeleton, not trace the surface.
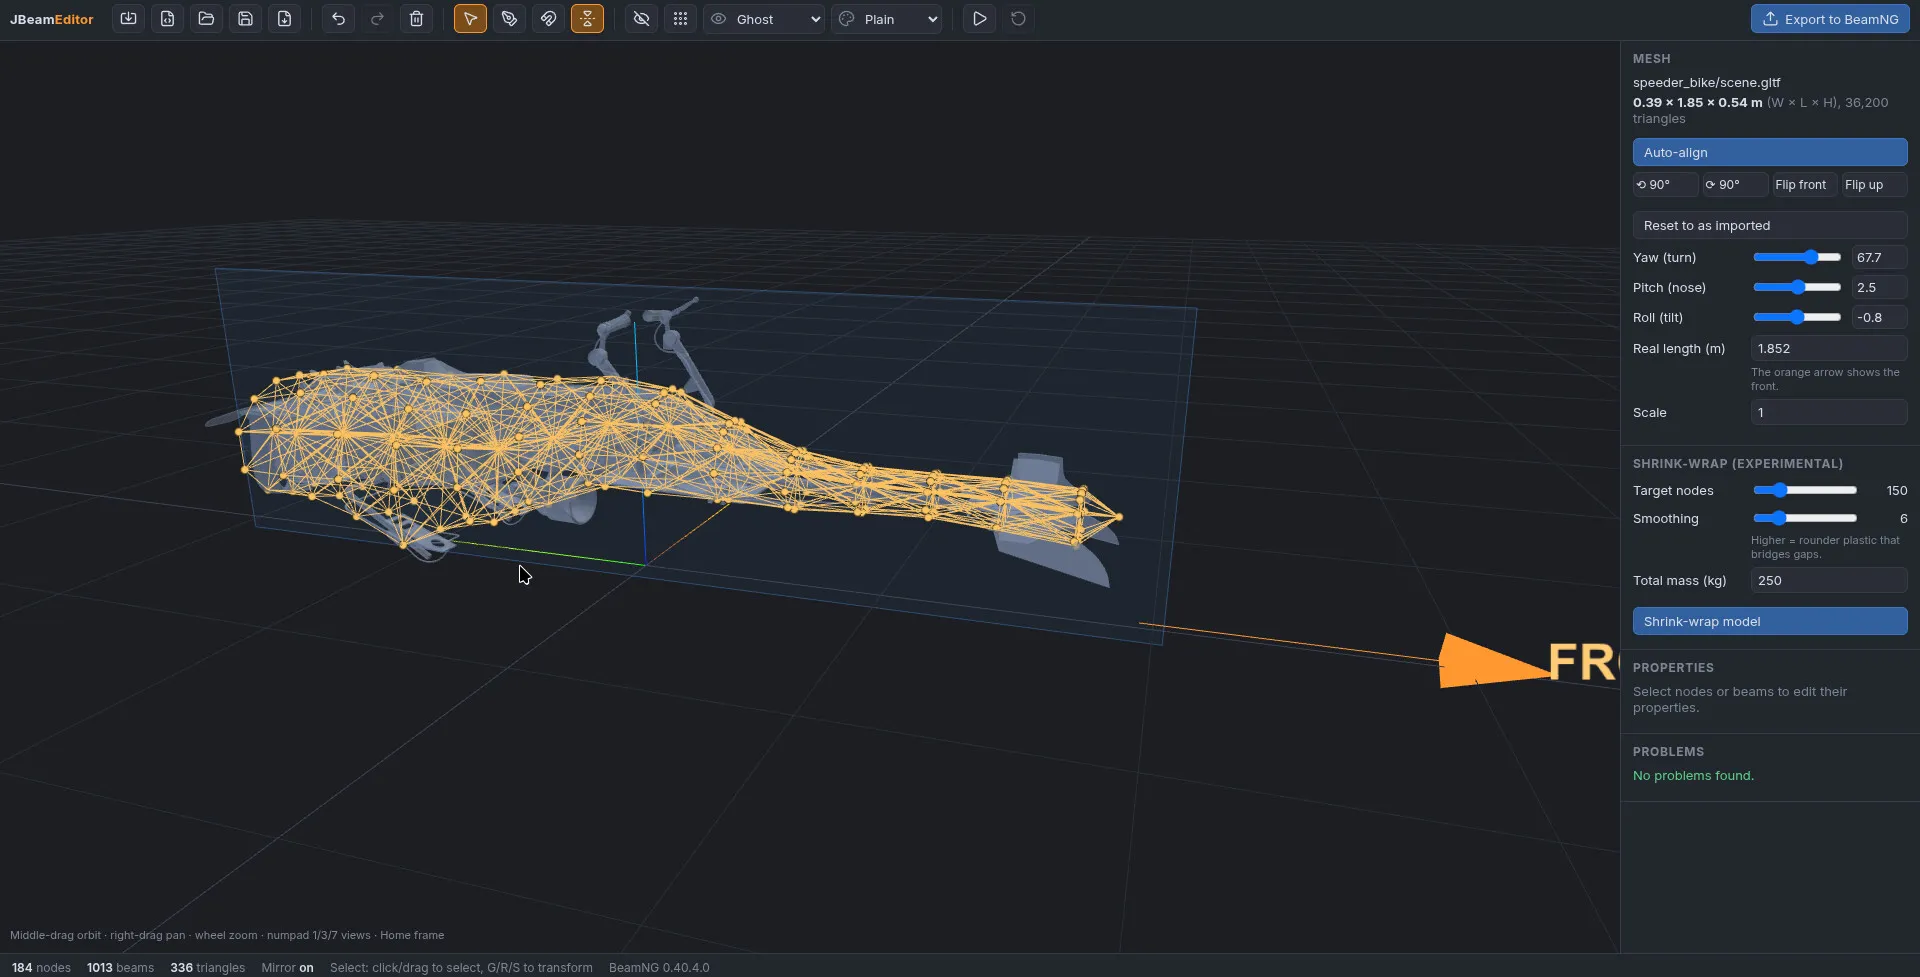
My first question was where it should live. A Blender plugin was tempting, since that’s where I model, but JBeam would have to be squeezed into tools built for meshes, and a live physics preview would be hard. So I chose a standalone app that could be designed entirely around how JBeam works.
My aim was for it to feel like the Figma of JBeam, so I borrowed patterns people already know. Layers sit on the left, built from the model’s own parts, and Design, Model and Test tabs sit on the right.
Drawing works like the pen tool in Illustrator: click to place points and they join into a line as you go, click an existing point to join onto it, and press Esc to finish. Anyone who has used a design tool should be able to draw a structure without reading a manual.
Getting around the 3D view felt awkward in my first test, mostly because there was no way to pan. So I set one rule: left click is always the action, never a modifier. The other mouse buttons move the view, and the familiar Blender shortcuts do the rest.
The first model I imported came in sideways, which told me normalising had to come before any generating. Downloaded models arrive at a random size and angle, so you can now auto-align them, see a big FRONT arrow, and type in the real length.
My first auto-align missed a slight tilt, so I suggested a different approach: find the model’s mirror line and straighten it against that. I also wanted a way to undo it, so every alignment change goes into the same undo history as editing. Nothing is a one-way door.
Small things got the same attention. A Problems panel flags issues as you go. A row of buttons I couldn’t tell apart became a proper menu with icons, and dropdowns change as you scroll over them, without opening.
Shrink-wrapping a model into a skeleton
The auto-generator is where most of the work went, and it took several attempts in one day to get right. Rather than jump straight to a pod racer, I scoped down to something simpler from my model collection and planned to scale up, so the test model was a speeder bike.
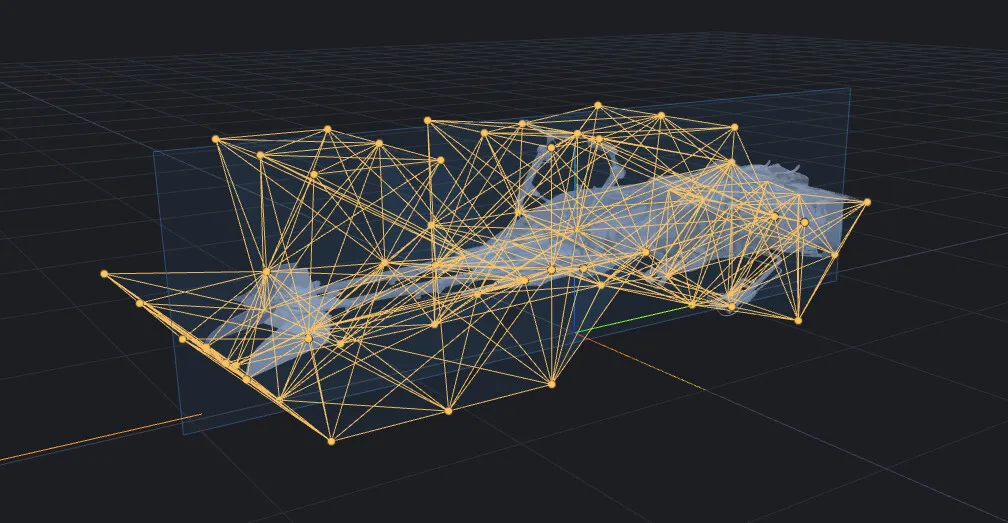
My idea came from shrink-wrap plastic: a simple, slightly rounded sheet that falls onto the model and pulls tight around it. To get there, I had simple test shapes built in Blender, getting more complex each time, so the method could be tried and improved on each one in turn.
It wasn’t a straight line. At one point the wrap suddenly looked “waaaay worse” than earlier screenshots. It was building the cage out of chunky blocks, so it floated well off the model, with long beams crossing empty air between parts.
In the game, those are invisible struts holding together things that shouldn’t be. The blocks needed to be far smaller, “like pixels”.
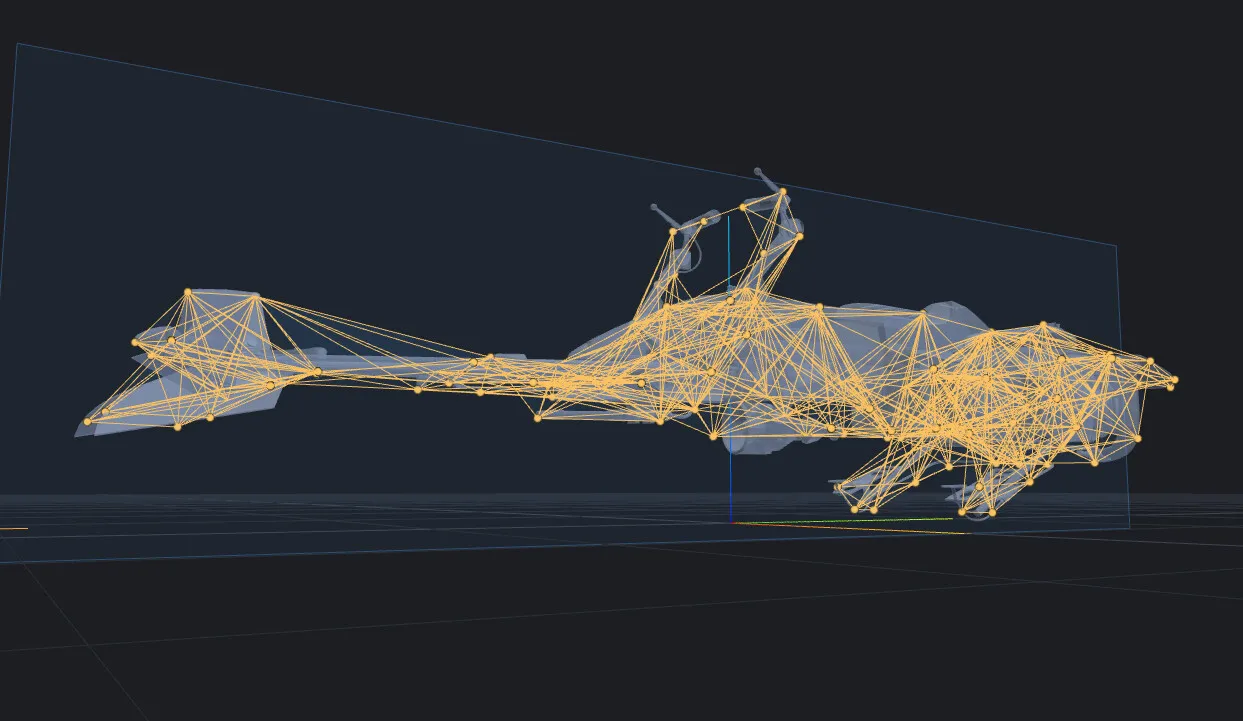
Tiny blocks everywhere made it slow, so I suggested filling the inside with big blocks first and only using smaller ones where they meet the surface. The shell that comes out is then smoothed and simplified until every point sits on the model’s surface. When I saw it, I said “this is the best so far”, though the biggest jump actually came from fixing a bug along the way.
Mirroring caused the next problem: parts that only exist on one side were being copied to the other. Wrapping each side separately made the structure lopsided, which was worse. So I went back to a fully mirrored wrap, then made it remove any copies with nothing underneath.
I’d also spotted beams jutting out of the model, so a final pass bends or drops any beam that leaves it. On the speeder, the share of structure running through thin air went from 84% to about 1.5%.
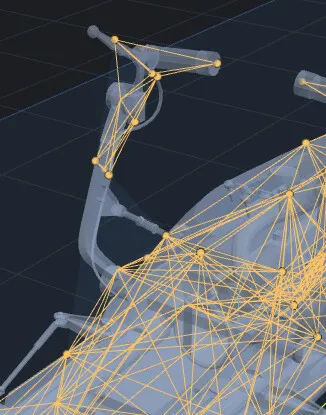
Thin parts were the hardest. Handlebars and rods came out as sparse, stringy chains, and sometimes a bar end was missed entirely.
My idea of wrapping a tube around each thin part didn’t help, because a JBeam resists stretching but not bending, so a thin tube still drooped. When that attempt made things worse, I switched to how weight was worked out, on the hunch that understanding the model’s volume better would help thin parts too. Thin parts are now traced along their middle and built as single braced branches.
The new weights looked better, but now the thin parts crumpled like paper. I looked at how real handlebars manage it: they’re thin but still strong. Leaving them weak wasn’t practical, so strength is now worked out separately from weight.
Testing it before the game
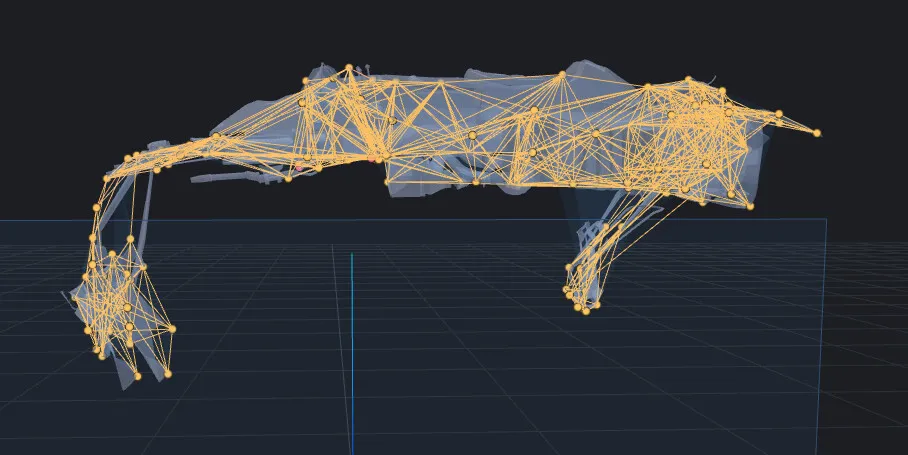
I wanted to see a weak structure straight away, without loading the game. So there’s a built-in physics preview that drops the structure on the ground or holds it in the air, with the model’s skin following along. It’s simpler than BeamNG’s own physics, and that was a trade-off I was happy with: quick checks here, rigorous testing in the game.
I added the hold test because the drop test was hiding something, and it showed up straight away: the model hung “like paper”. The front boom is a very flat ladder with heavy vanes on the end, so it folded down, and the footrests hung off a narrow neck.
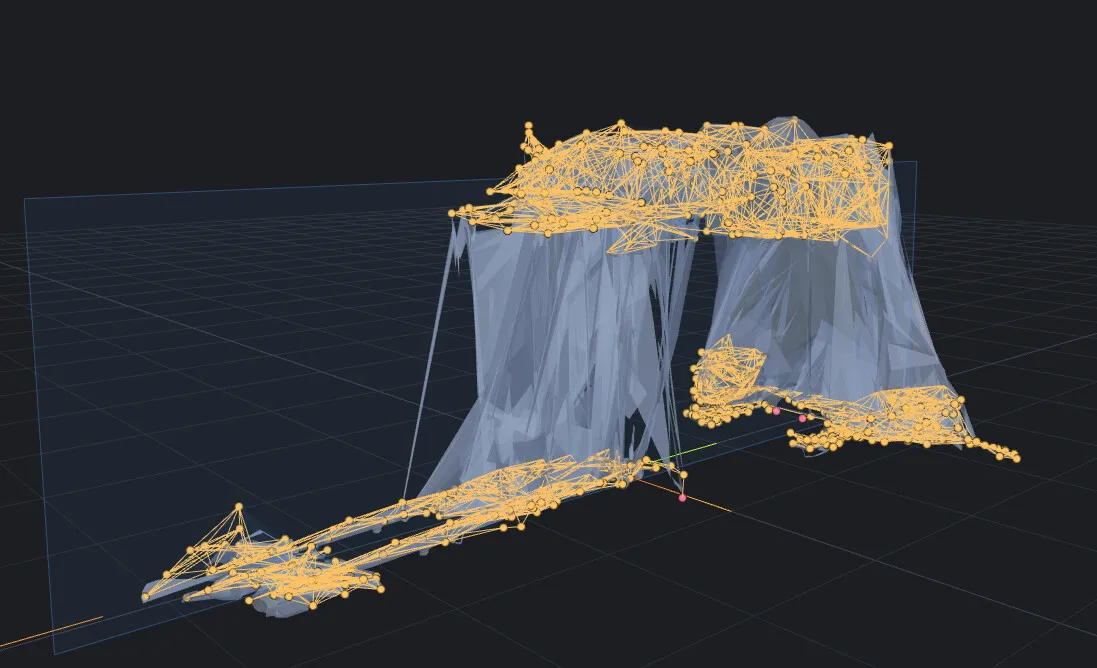
Wrapping each part separately caused two more problems at once. The parts weren’t joined, so everything but the body fell away, and the skin clung to the wrong parts and smeared down like curtains. Touching parts are now joined automatically, and each part’s skin only follows its own structure.
Joined up, the prongs, handlebars and footrests were still “jelly and flappy”. So I added “Stiffen floppy parts”, which tests rather than guesses: it holds the structure up, finds what droops, braces it to the steadiest points, and keeps each change only if it helps.
The braces stay inside the model so they can’t stick out. On the speeder it took the sag from 140 cm down to 10 cm.
How it’s built
It’s a browser app in TypeScript and Three.js that runs locally, with a small helper so it can use the desktop’s own file dialogs.
It was built test-first, with over 200 tests, plus a “lab” of test shapes and real models that scores each version on things like how much of the structure runs outside the model and how much it sags. That let me tell whether a change to the generator was actually better, instead of judging by eye.
Where it’s at
Importing, wrapping, editing, physics testing and export all work, and I’ve already used it for a few of my other mods. It isn’t perfect, but it gets a model into BeamNG fast and reasonably accurately, at roughly the quality of a car exported from Automation, which is far quicker than building a JBeam by hand.
Next are material presets per part, using the model itself as the deforming skin in game, and proper hinge, latch and bolt tools for parts that need to move. Stiffening still freezes the screen for a few seconds, which I want to fix. Further out, it becomes a desktop app.
The speeder bike test model is a free download from Sketchfab, by Mind Mulch for The Masses (CC-BY).